Saturday, July 13, 2013

Finishing My Cap

The weaving is done, and now it’s time to clip off the sticks, clean the inside of the cap, and do the final shaping.  This was the scariest part for me, as I hoped my cap would not fall apart.  My mentor, Verna, told me if my weaving is tight enough, it shouldn’t.
 
Initially I decided to cut the warp sticks just to 1/8 inch below the last row of weaving.  Then do the final clipping after shaping the cap.  To shape the cap, I soaked it and filled a zip-lock baggie with wet sand inside of the cap.  I let it sit and dry for a couple days and then cleaned the inside with small clippers and scraped it with a knife.  I’m told in the old days they used a shell to clean the inside of their baskets.  Finally, I clipped the warp sticks right close to the last row of weaving.
 
When I first cut the sticks to the 1/8 inch length, I was totally surprised (and undone!) to find my cap was too small to fit on my head.  All along I thought it was probably going to be too big for me.  But instead, I had made a child’s cap?!  I laughed, but felt disappointed I’d never be able to put this cap on my head.  I tried not to panic, but thought, OK, there is still a lot of cleaning of the inside of the basket to be done which is taking up space, plus the 1/8th inch of sticks which is not allowing the cap to set down fully on my head.  I continued on with cleanup process, soaked the rim of the hat one last time and then tried it on.  Almost magically, and to my great relief, the cap fits my head perfectly!
 
The pictures that follow show the completion process and my finished cap.


 Starting to clip...


 The last 3 sticks to clip...


Oh My Gosh!! It's too small!


 Cap needs to be shaped and clipped inside...


 Shaping the cap with wet sand...


Tools I used to finish the inside...


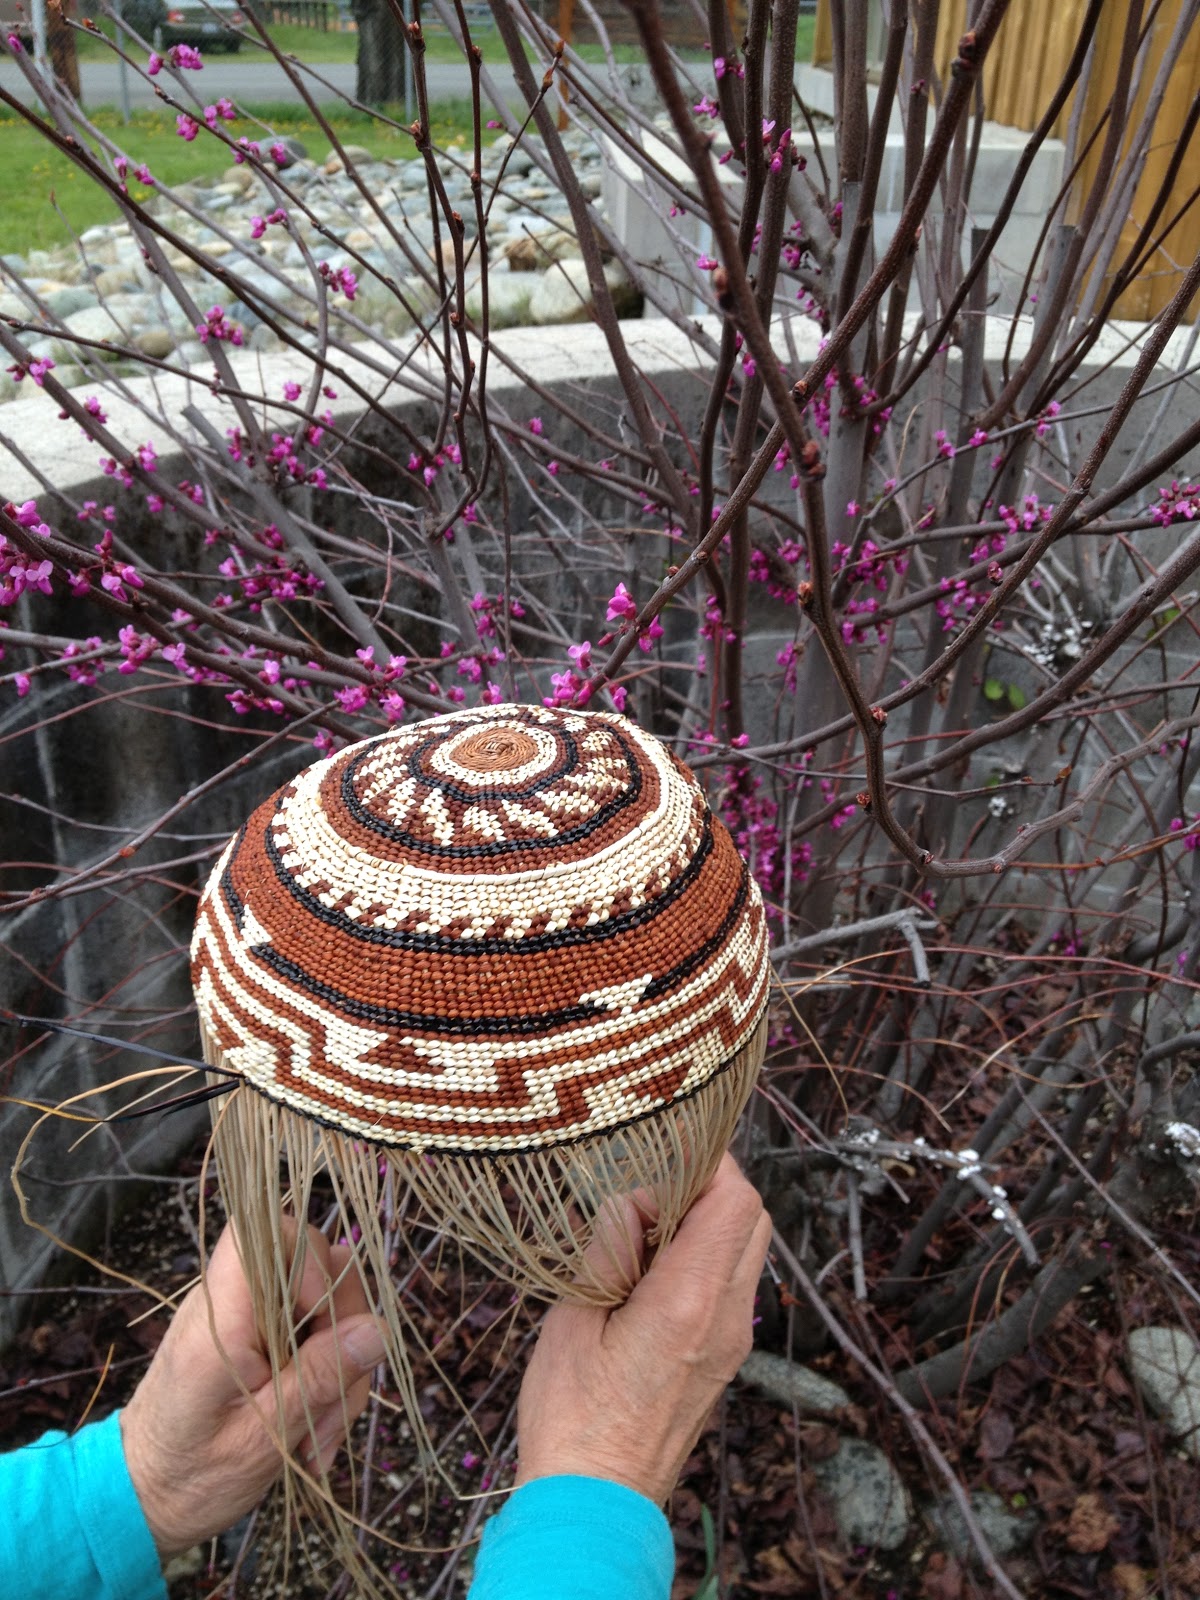
It's done.


 ... and it fits.
 

Monday, June 17, 2013

Finished the Weaving on My First Cap !


I’ve finished the weaving!!

Next step is to clip and clean the inside of my cap and then shape it with wet sand. I will be blogging that process. For now, I’m feeling very happy to have the weaving completed. This has been a big project for me, with many challenges and many ups and downs. I look at my cap and see the imperfections compared to the old time basket weavers. But, I’ve learned so much over this past year that I’m not sure I have even comprehended it yet. I have to remind myself that this is my “first cap”, it’s okay, and the next one will be better. The highlight of my day was receiving a text message from my daughter, Neva, who lives in Portland, asking me, “Can I wear your cap”? 


... it still has to be trimmed and shaped.

Wednesday, June 5, 2013

The Cap has Three Sections

I am told there are three parts to our ceremonial caps.  Each section is bordered by a stick that goes around the cap and is wrapped with a weaving material.  I have chosen to wrap my sticks with bear grass. This “wrap around” stick gives the cap strength and support.  It also, I think, looks nice giving the cap a variance in visual dimension.  Today my husband Marty came along to take some video pictures, which will show the process better than trying to explain it.

The top of the cap, up to the first wrapped stick, represents a woman’s childhood.  The middle and largest portion of the cap between the two wrapped sticks, represents a woman’s adult life. The final and smallest portion of the cap represents a woman’s elder years.

I am now ready to begin the final stage of my cap!


Wrapping the "wrap around" stick with bear grass

 
End of the day progress... made it all the way around.
 

The following are YouTube videos of this day's session:

 Deciding how many more rows are necessary and
deciding what size stick to use as the encircling
wrapped stick (2:00):
 
Talking about how the cap will be finished (3:27):
 
Learning how the wrapped sticks are joined/replaced (2:33):
 
De-ribbing the bear grass (1:04):
 
Wrapping the stick that encircles the basket (8:06):
 
Replacing/adding to the wrapped stick (3:54):


Sunday, May 12, 2013

Fourteen More Rows to Completion

I met with Verna today to discuss the finishing of my cap. I’ve decided to shorten or consolidate my original design pattern based on an old cap I have pictures, from a cap in a museum. The finish will have all the same elements as the museum cap and I am confident, still look beautiful.  As a basketweaver, we are by nature “perfectionists”, but it’s also okay to be flexible and see where the basket takes you.
 
One of the many things I have learned…
My materials for this cap are bigger than the materials used in the cap I am modeling mine after, and it turns out that really matters in regards to the design.  In my next cap, I will make adjustments for that factor and start earlier on, at the beginning of the cap, to make the needed design adjustments.
 
I am in deep respect of our old time Karuk weavers and the beautiful, exquisite basketry they created. I also greatly appreciate my teacher for the time she has spent teaching me and all I have learned from her.
 
It’s a journey; not necessarily easy, but so worthwhile and rewarding.


Monday, April 22, 2013

Spring Gathering 2013

It’s time to gather materials for the coming year.  Every season is different, so time must be spent in the mountains watching for the perfect time to gather.  Right now, willow is ready and in some areas hazel is ready.
 
When it’s time to gather our materials, the actual weaving of baskets must take a back seat; so not much progress is happening on my cap at this time. As much as I want to be weaving, the Big Picture is a cycle and a very time sensitive process.  When the materials are ready, everything else has to wait.
 
I may have said before, that the very best materials are from sites that have been either burned in the past few years, or have been managed.  Managing involves cutting back the plants so that the next year they will want to send out lots of new, straight shoots.  Burning and managing the plants also tends to minimize the bugs.  Sticks that have spots where bugs have burrowed in must be discarded because those spots weaken the sticks and they tend to break more often.
 
New willow produces a very straight shoot which is fairly white when it dries.  Hazel dries a little darker and it has sort of a zig-zagged straightness – but it’s stronger than willow.
 
Following are pictures of hazel and willow gathering and processing.
 
Yôotva. Thank you for reading my blog.


Drove to the river twice in the past two weeks  to collect
willow.  It wasn't quite ready the first trip, but was much
better this past weekend.


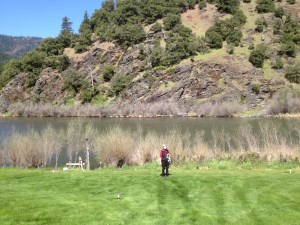
This area has been managed.  I'm so fortunate to
 be able to collect materials in such a beautiful place.


We also collected some hazel this past weekend.


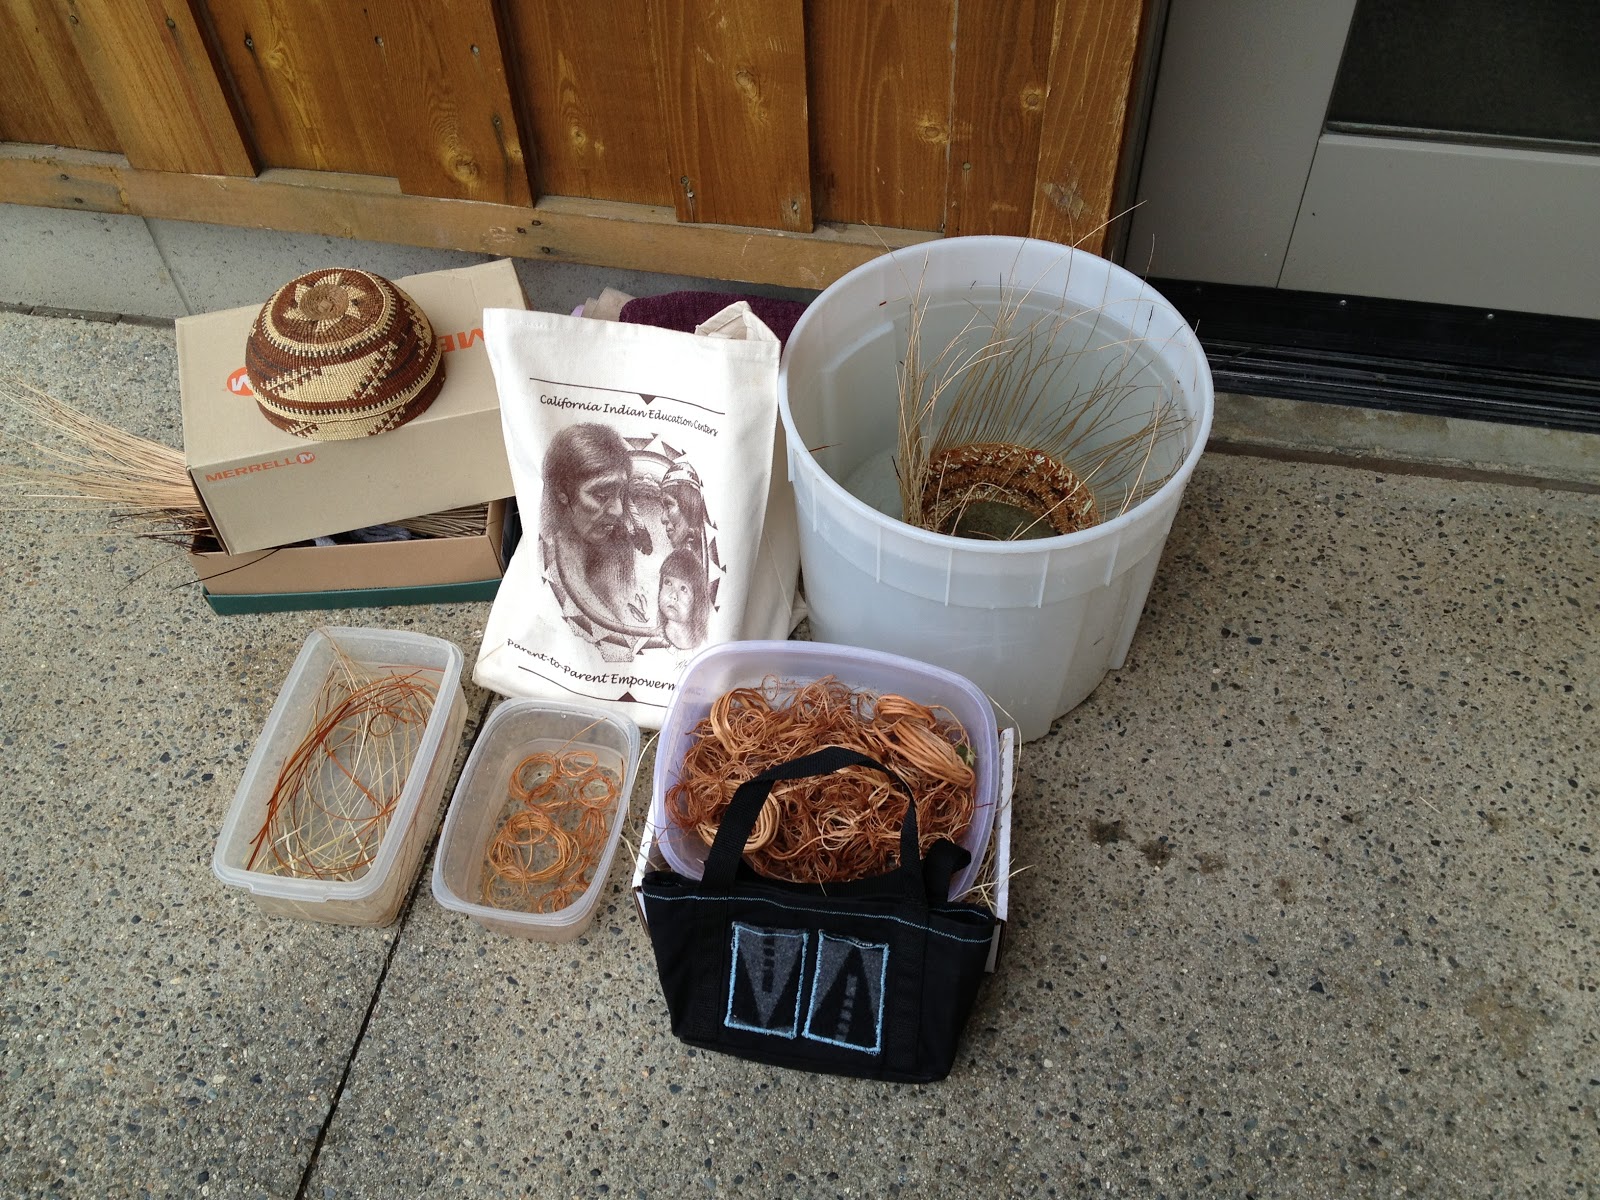
The two bundles on the left are hazel and the two
on the right are willow.  Once the materials are sorted
and sized, each pile will be much smaller.
I think I have enough willow for next year (combined
with what I already have), but I'll
 need to collect lots more hazel.


Sunday, April 7, 2013

Change of Plans


I have had to come to terms with the fact that my cap is getting too big.  So, I am altering my original design pattern.  I have had to make the tough decision to leave some of my original elements/design out.  I continued to work closely with Verna today on my technique and forever pulling my sticks closer and tighter.  A lot of it has to do with the size of weaver and overlay material.
 
It is Spring and time to start gathering our materials.  You can feel the excitement in a room full of basketweavers, getting ready for another season of being outdoors by the river and in the mountains gathering our materials to carry us through until next year.  I stopped on my way home to check the willow.  A friendly Forest Service Law Enforcement officer stopped to question me about what I was doing. He was quite curious about my willow sticks in hand.  I smiled and said, “I’m a basketweaver, and it’s time to gather willow.” I explained to him how in the Spring when the plants start to grow and put on new growth, the sap is flowing allowing the bark to peel easily from the sticks.  He smiled, shook my hand and went on his way.


This is what the inside of my cap looks like. 


My materials soaking, waiting for Verna to arrive.


This is what my cap looks like today. 


Peeled a few "test" willow sticks today.


Sunday, March 10, 2013

Skills and Techniques

Today Verna and I were discussing what skills and techniques I have learned so far in this apprenticeship.  Basically I have and will continue to refine all aspects of my weaving skills. This includes sizing my material, changing overlay material to create pattern and design, drawing my sticks in more aggressively, not over soaking my material, and not being afraid to manipulate my sticks into the shape I want my basket.  I’m also getting more comfortable with being able to look at a design on a basket and replicate it on my own basket without having to draw it out on graph paper.


Sunday, March 3, 2013

Spring is coming!

Today was a beautiful drive down the river to meet with my basketweaving teacher.  White, snow topped mountains, billowy white clouds and blue, blue sky! 58 degrees, which is warm compared to the past couple weeks. The River is full and rushing with the winter rains. It was good to see Verna and the other basketweavers. It’s been a month since I have made the drive due to icy roads.
 
My cap is coming along. My challenge at this point is to pull my sticks tight and bring the cap in so it will fit my head, not Bigfoot’s. Verna worked with me today on my weaving technique. I haven’t been using my left hand properly to support and manipulate the sticks into the shape I desire.  I had to focus on breaking some bad habits and learning to manipulate my materials in a new way. If I can keep that focus, I’ll conquer this new way and be happier with my results.
 
Spring is coming.  Gathering time is near!!
 
It was a good day of weaving. We had some fun taking pictures of my cap as seen below.


Remember, we are basket weavers... not videographers.


Sunday, February 3, 2013

Basket Cap Progress


My progress may appear slow to an outsider, but I am so pleased in what I am learning, and how my weaving skills are improving. This cap is definitely pushing me to my skill limits.  I’m so grateful for this grant; for without it I may have given up and decided I would try something easier. But, pushing myself beyond what I think I can do is what helps me learn, grow and become a better weaver.
 
I am now comfortable with replacing sticks that are too small or have weak spots due to bug holes. Although, I realized today if I kept replacing sticks, I was going to end up with a cap for a giant.  The sticks need to get smaller toward the bottom of the cap so the weaving gets tighter and will fit my head. I confirmed this with Verna, and she said yes that was exactly right.
 
The pictures below will show the beginning of the pattern for the body of my cap. My job now is to keep pulling my sticks tight, so as to form the cap to my head.


Sunday, January 13, 2013

Winter Weaving

Today I made it into the River to see my teacher. Due to the holidays, inclement weather and dangerous driving conditions, it’s been a month since I was last there.  It was good to see Verna and weave with her. The roads were clear with some icy patches. Lots of snow on the sides of the road. At one point at the California/Oregon border, my car thermometer read 7 degrees.  Brrrr!  There were lots of fallen rocks on the road, which I tried very hard to miss. I really hoped for no flat tires today. I did see a beautiful 3-foot tall Eagle perched in a tree right next to the road. Unfortunately she flew off before I could get a picture.  I also saw a huge heard of elk, which I’ve never seen before in all the years I’ve been making this trip.
 
OK. How’s my cap going?  Today I got my two rows of black completed, and I am excited to be moving into middle of the basket.  I’ve been told this part of the cap represents a woman’s middle years. The next few rows will be woodwardia red.  Woodwardia is much easier to work with than black fern. There will not be any design in these next 4-5 rows. I will however be adding sticks and replacing sticks that are getting to small.  So, although there may not appear to be much going on in this section once completed, this is an important place to be turning the cap down, but at the same time keeping its shape.  Not adding enough sticks at this point will make the cap go straight down.  Adding too many sticks will make the weaving bumpy. Adding just the right number of sticks gives the cap a nice rounded shape to [hopefully] fit just right on my head. It’s a delicate balance that comes with experience. Pictures of my cap progress to follow.


Sunday, December 9, 2012

Refining My Technique


This section of my cap is difficult and slow going as every two sticks the pattern changes color  red to white, red to white etc. Also, some sticks are getting too small and need new sticks added to replace them so as to keep consistency in size.  Sometimes when I’m weaving on my own I might forget exactly how Verna has taught me to do things, so I figure out my own way.  Today, Verna reminded me of her technique for changing color.  It’s a very small difference to what I was doing, the end result is the same, but there is one less step in the process.  Over time this will help to make me a faster weaver.  When replacing sticks, I was weaving two sticks together, and on the next row breaking the smaller stick off.  Verna said not to weave the two sticks together, but to break the smaller stick off first, then place the new stick in its place and weave around it.  This seems more difficult as there seems to be nothing to secure the new stick to, but the end result is a smoother more consistent weave.
 
I only got half way around my basket today, which took several hours. But of course there was plenty of socializing that took place.

One week ago.

Today's progress

Sunday, November 18, 2012

Taming Wild Horses


I once heard a basketweaver describing a basket she was making was like “taming a wild horse.”  That's how I have felt with my cap in this process of turning the top down to move into the body.  My teacher tells me you have to be the “boss” of your sticks and let them know what you want them to do.  Through experience one learns how to control and manage the sticks by applying just the right amount of pressure and pull without breaking the sticks, weavers and overlay material.  It is a delicate balancing act, with many trial and errors and mistakes.
 
I tore an entire row out (hours of weaving) so my teacher could help me tame my basket.  She helped me rein it in, turning the sticks down to form the body of the cap.  I learned so much today by watching my teacher with her years of basketweaving experience.

My beautiful teacher with the beatiful rosebud plant
outside our classroom.
 

I'm beginning to turn my cap down.
 

Sunday, November 11, 2012

Completed the top of my cap

I finished the pattern to the top of my cap, which represents our “childhood” years.  At this part of the cap where it will now start to turn down, a stick is added which goes around the circumference of the cap.  It’s then wrapped with an overlay material.  I have chosen to wrap a willow stick with bear grass.  This technique adds strength to the basket as well as a 3-dimensional depth in the pattern.  I was very excited to get to this point in my cap, as now I’m moving into the next phase or a new section of my cap that traditionally represents adulthood.
 
Following are pictures of my progress.
 
This is the completed pattern for the top of the cap.
 

Adding and wrapping the "divider" stick, which
adds strength before turning the cap down.


Sunday, October 21, 2012

Tools We Use


Today we had a visitor.  Emily from Oregon Folk-Life, the sponsor of our grant, drove from Eugene (5 ½ hours!) to meet Verna and I and discuss our projects progress.  One of the topics that came up was the type of tools we use today with our basketweaving.  Before white contact, our Karuk ancestors did not have metal, but I’m sure if they did, they would have used pocket knives, metal awls, scissors and clippers. Recently Verna acquired a bear grass “sizer” made by a woman in Washington.  We are in the process of refining it, but it seems to work great in getting long straight identically sized bear grass blades. It’s a piece of wood, about 4 inches long, with two small pieces of razor blade inserted parallel to each other at one end of the wood.  The bear grass is then pulled in between the two razor blades sizing them perfectly. Beautiful baskets can be achieved when a weaver’s materials are as close to the same size as possible. Below are pictures of some of our weaving tools, and my cap progress to date.  It was a good day.


My progress to date.


Emily interviewing Verna.


Emily and Karen looking at basket materials.


Tools, including my favorite antler awl made by a friend.
 

Newest tool! Beargrass splitter.
 

This shows the blades.
 

Sunday, October 14, 2012

Learned Something New Today

The two-hour drive to meet with my basketweaving teacher, Verna, is on a remote two lane windy road.  Most of the way there is no cell phone reception. Today at about an hour and forty minutes in, I had a flat tire.  I have never had to change a flat before.  Fortunately, there was cell reception at that spot (my lucky day!), so I called Verna.  She said she would come help me out.  I proceeded to get the spare tire, jack and instruction book out.  I was all set up when Verna pulled up 20 minutes later.  Just at the same time, two giant bald eagles circled and perched in a tree not too far from us.  We got the tire changed and headed on into class.  I’m including a couple pictures of Verna and my “learning cap” to date.  Thank you Verna for teaching me to make baskets and change flat tires!!


Verna helping change my tire.
 

Verna is working on her own new cap.
 

My cap progress to date.
 

Friday, October 12, 2012

Dying Woodwardia Fern with Alder Bark

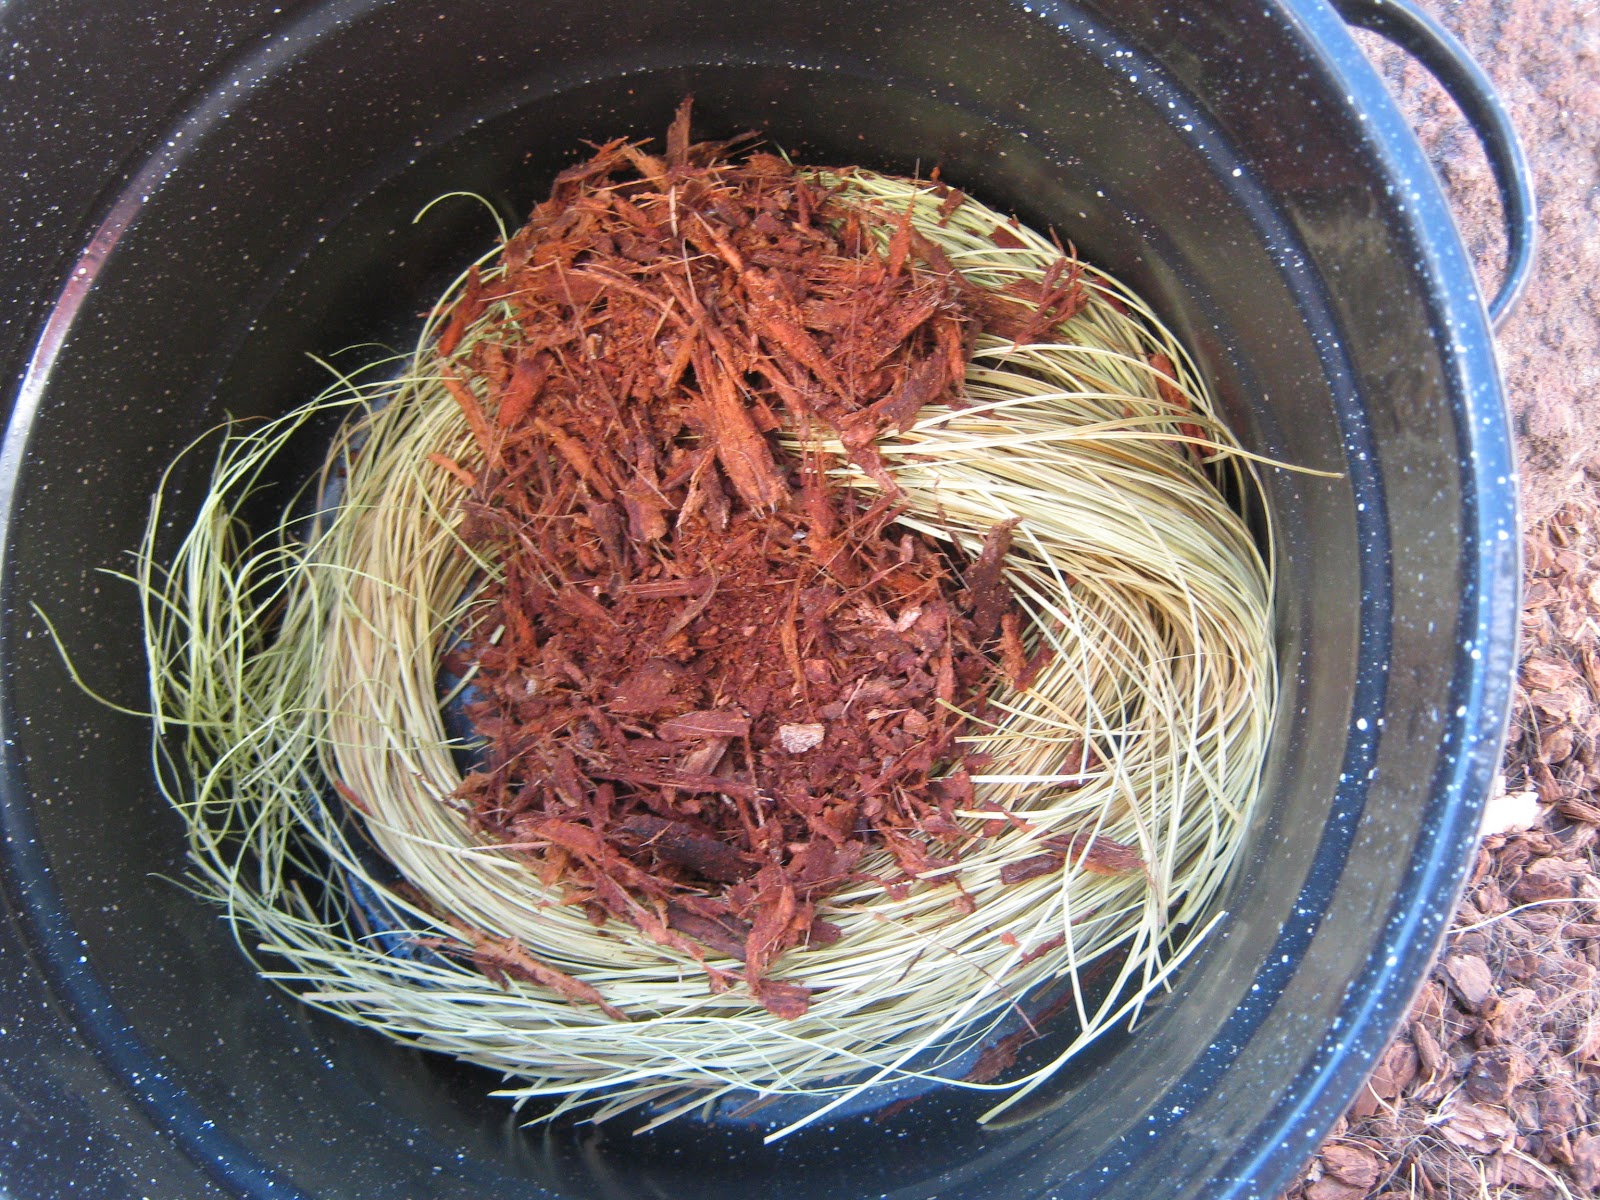
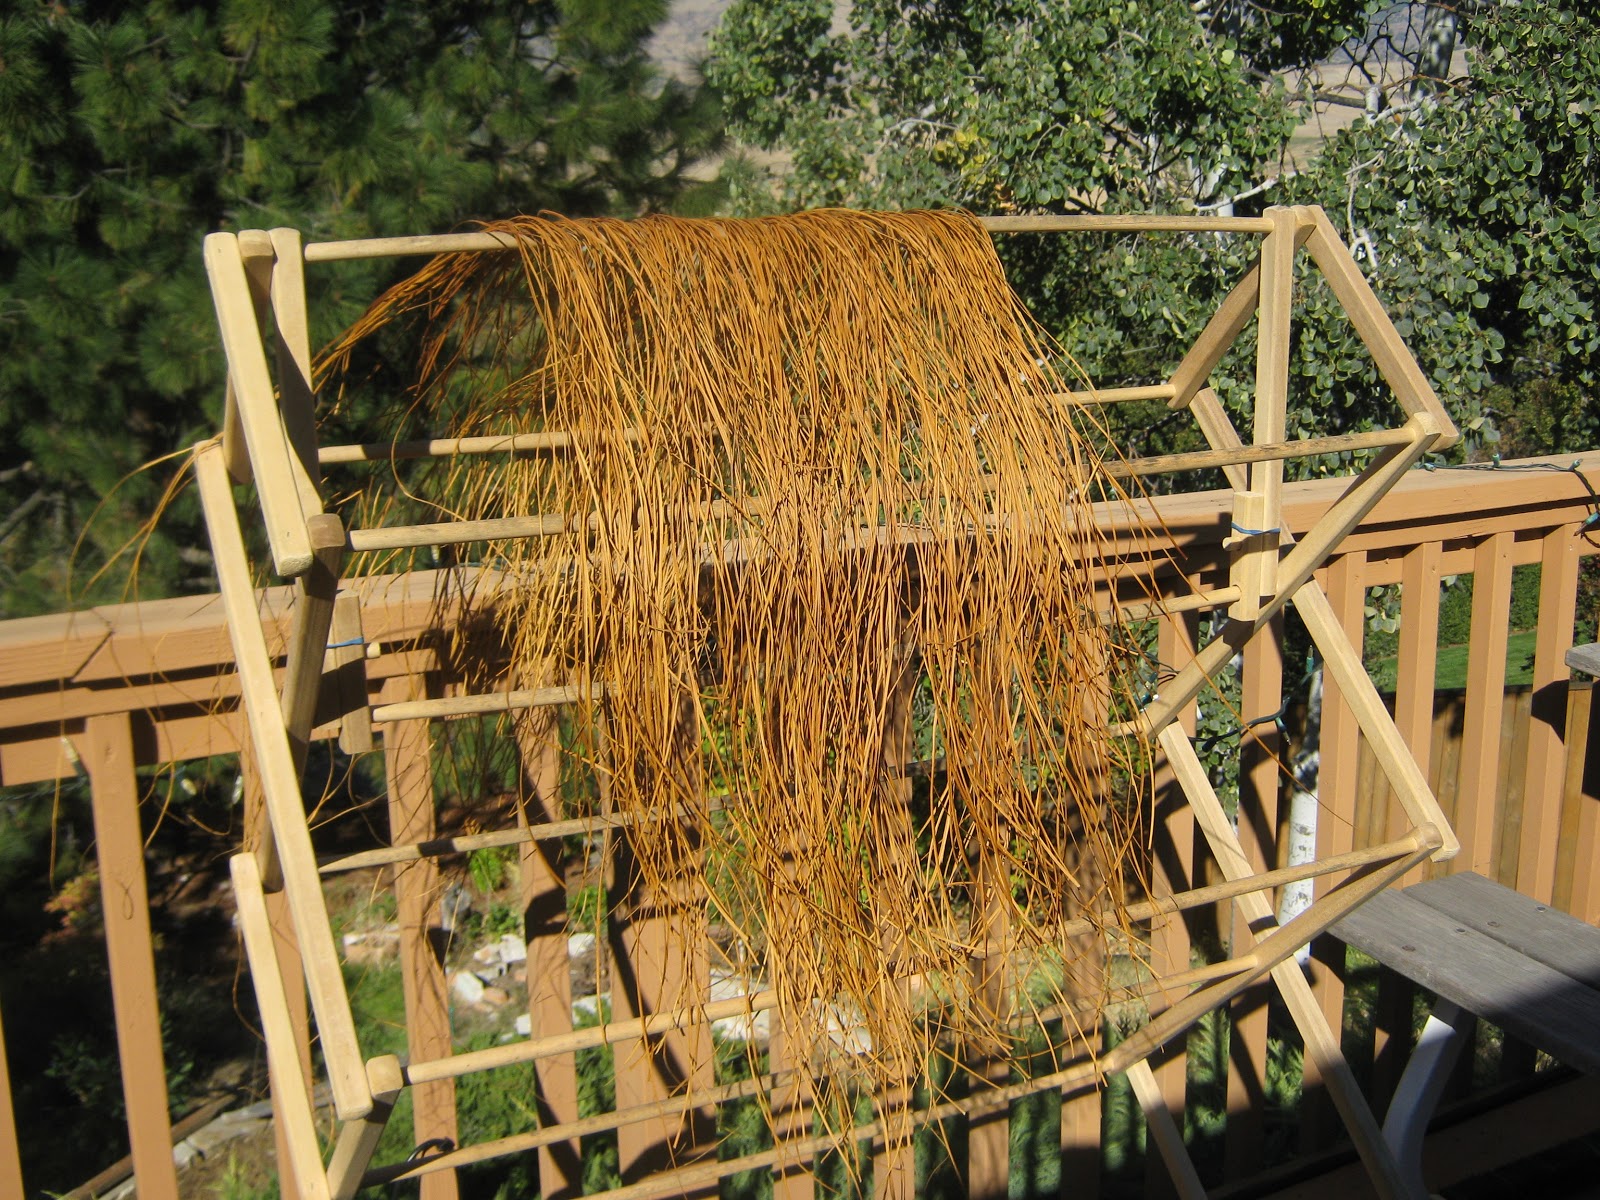
A small section of bark is taken from an alder tree and the outer layer is removed.  When the inner bark is exposed to air, it turns a beautiful rust/red color.  Every tree will yield it’s own individual color.  The inner bark is broken into small chunks and then pounded with a rock.  These crushed pieces are then placed over the bundled woodwardia in a pot of cool water, and left to soak until the desired shade is reached.  The fern is then hung in the sun for a day to dry and set the color.  After drying, the woodwardia is bundled for storage.

Removing the outer bark.


Chunks of inner bark ready for pounding with a stone.


Pounding the inner bark.


This is the pounded alder bark on top of bundled
woodwardia fern just waiting for water in the pot.


Submerged woodwardia.


Drying in the sun to set the color.  The color deepens
as it's exposed to the air.
 
 
Woodwardia bundled for storage.